
The Philippines eTravel Pass is the country’s mandatory digital health and travel declaration system, required for all arriving and departing passengers at Philippine international airports and seaports. If you are planning a trip to the Philippines – whether as a tourist drawn to the pristine beaches of Palawan and Boracay, a returning Overseas Filipino Worker reuniting with family, or a business traveler attending conferences in Manila – understanding how the eTravel system works is absolutely essential for a smooth and stress-free airport experience. Missing or incorrectly completing this registration can result in denied boarding, extended processing times at immigration, or even being turned away upon arrival.
This comprehensive guide covers everything you need to know about the Philippines eTravel Pass in 2026: what it is, who needs to register, how to complete the registration step by step, required documents, visa-free entry rules, common mistakes to avoid, and answers to frequently asked questions. Bookmark this page for your trip planning.
What Is the Philippines eTravel Pass?
The eTravel Pass – officially known as the Philippine Travel Information System – is a free, web-based platform developed by the Philippine government to digitize and streamline the arrival and departure process for all international travelers. The system is the result of a multi-agency collaboration between the Bureau of Quarantine (BOQ), Bureau of Immigration (BI), Bureau of Customs (BOC), and the Department of Transportation (DOTr).
The eTravel system was introduced to replace the older One Health Pass platform, which itself was implemented during the COVID-19 pandemic. While the original health pass focused primarily on health declarations and vaccination records, the eTravel system has evolved into a comprehensive travel information platform that serves multiple purposes: health screening, immigration processing, customs declarations, and travel data collection.
The entire system operates under Republic Act No. 11032, also known as the Ease of Doing Business and Efficient Government Service Delivery Act. This legislation mandates the digitalization of government services to reduce bureaucracy and improve the citizen experience. The eTravel system is one of the most visible implementations of this law, processing millions of travelers each year through a streamlined digital interface.
Key Facts About the Philippines eTravel System
- Cost: Completely free – no fees are charged at any stage of registration. If a website asks you to pay, it is not the official platform.
- Official website: https://etravel.gov.ph – always verify the URL starts with
https://etravel.gov.ph - Mobile app: Available through the eGovPH super-app (downloadable from both the Apple App Store and Google Play Store)
- Who must register: All arriving and departing international passengers, regardless of nationality, including Filipino citizens, foreign nationals, OFWs, balikbayans, transit passengers, and cruise ship passengers
- When to register: Within 72 hours (3 days) before your scheduled flight arrival or departure
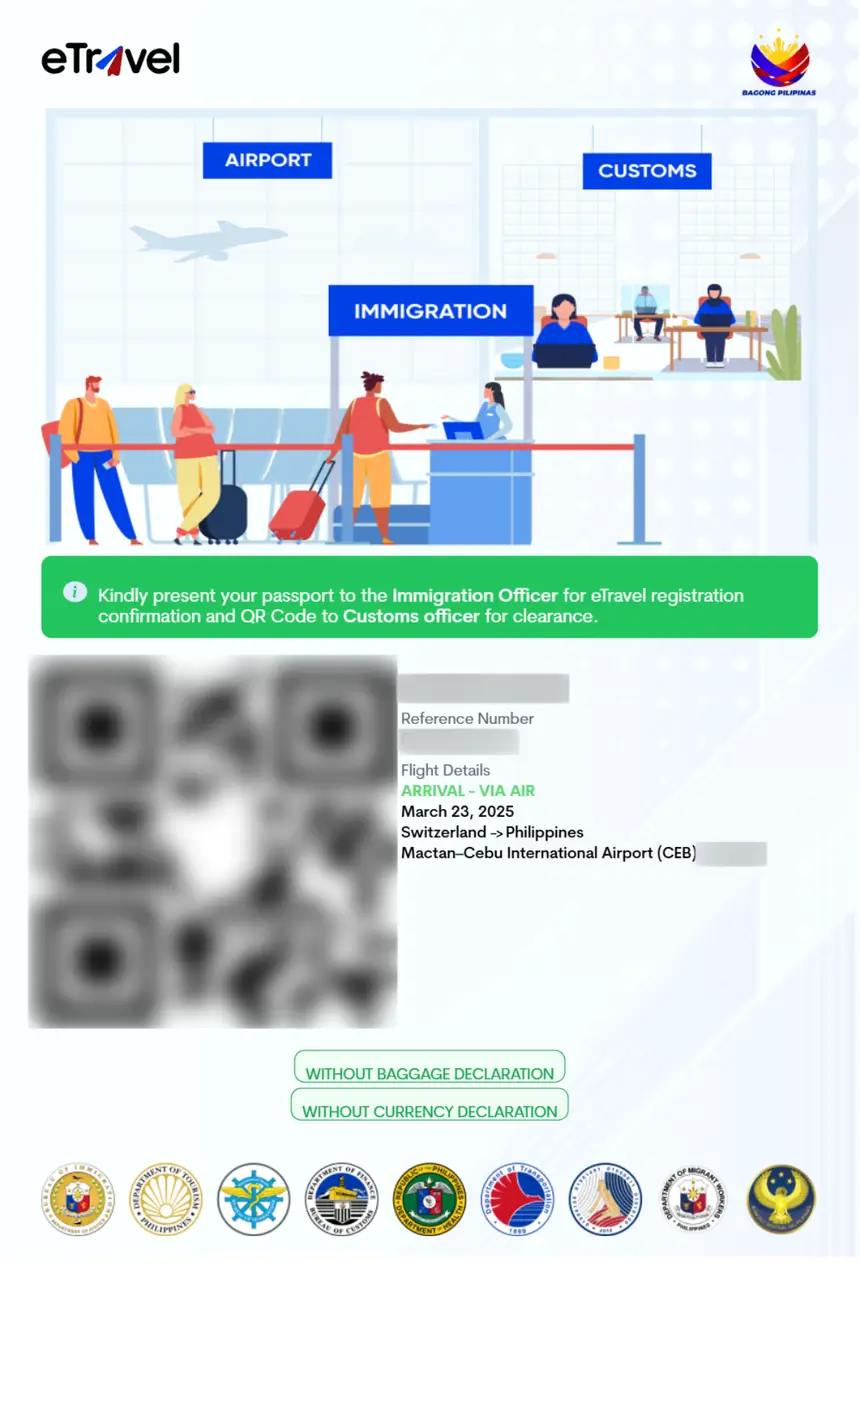
- QR Code: A unique QR code is generated upon successful registration and must be presented at immigration checkpoints
Who Needs to Register for eTravel?
All International Arriving Passengers
Every person entering the Philippines through an international airport or seaport is required to complete eTravel registration before arrival. There are no exemptions based on nationality, age, or purpose of visit. This requirement applies to:
- Foreign tourists visiting the Philippines for leisure, sightseeing, or beach holidays
- Returning Overseas Filipino Workers (OFWs) coming home after working abroad
- Balikbayans – Filipinos living abroad who are returning to the Philippines for a visit, often with special privileges under the Balikbayan Program
- Business travelers and conference attendees visiting for professional purposes
- Transit passengers who are passing through Philippine airports on their way to another destination
- Cruise ship passengers arriving at any Philippine port of call
- Diplomatic and official passport holders – even diplomats must complete the registration
- Filipino permanent residents of other countries returning for visits
- Children and infants – all passengers, regardless of age, must have their own individual eTravel registration
Departing Filipino Passengers
Filipino citizens departing the Philippines for international destinations are also required to complete an eTravel declaration. This outbound registration was introduced to facilitate smoother immigration processing at departure and to collect outbound travel data for government statistical purposes. The process is identical to the arrival registration – you simply select “departure” as your travel direction.
How to Register for eTravel: Step-by-Step Guide
Method 1: Web Registration (Recommended for Most Travelers)
Step 1: Visit the Official Website
Open any web browser (Chrome, Safari, Firefox, Edge) on your computer, tablet, or smartphone and navigate to https://etravel.gov.ph. The website is responsive and works well on all screen sizes. Ensure you are on the official government domain – avoid lookalike sites that may charge fees or collect your data fraudulently.
Step 2: Create an Account or Log In
If this is your first time using eTravel, you must create an account. Click the registration button and provide a valid email address that you can access while traveling. The system will send a verification email – click the confirmation link to activate your account. Returning users can simply log in with their existing email and password.
Step 3: Fill in Personal Information
Complete the registration form with accurate personal details. Every field must match your travel documents exactly:
- Full legal name (exactly as printed on your passport – including middle names and suffixes)
- Date of birth (day, month, year)
- Gender
- Nationality and country of residence
- Passport number and passport expiry date
- Valid email address and mobile phone number with country code
Step 4: Provide Travel Details
Enter your specific trip information. This section links your registration to your actual travel itinerary:
- Airline name and flight number (e.g., “Philippine Airlines PR105”)
- Date of arrival or departure
- Port of entry – select the correct Philippine airport (Ninoy Aquino International Airport/NAIA Terminal 1, 2, or 3; Mactan-Cebu International Airport; Clark International Airport; Davao Francisco Bangoy International Airport; Iloilo International Airport; or others)
- Purpose of travel (tourism, business, employment, transit, etc.)
- Philippine accommodation address – provide the full hotel name, street address, city, and province. If staying with family or friends, provide their residential address.
Step 5: Complete the Health Declaration
The health declaration section collects basic health information as part of the Philippine government’s public health monitoring system:
- Whether you are currently experiencing any symptoms (fever, cough, difficulty breathing, etc.)
- Countries you have visited in the past 14 days before arrival
- Vaccination status for relevant diseases (if applicable)
- Whether you have been in contact with anyone diagnosed with a communicable disease
As of 2026, COVID-19 specific requirements (testing, vaccination proof) have been relaxed, but the health declaration fields remain part of the standard form.
Step 6: Review All Information and Submit
Before submitting, carefully review every piece of information you entered. Common errors include misspelled names, wrong passport numbers, and incorrect flight numbers. Any discrepancy between your eTravel registration and your actual travel documents can cause significant delays at immigration or even result in denial of boarding. Once you are confident everything is correct, submit the form.
Step 7: Save and Download Your QR Code
After successful submission, the system generates a unique QR code tied to your specific trip. This is your digital travel pass. Save it in multiple ways:
- Take a screenshot and save it to your phone’s photo gallery
- Download the PDF version if available
- Email it to yourself as a backup
- Print a physical copy as a failsafe in case your phone battery dies
Immigration officers at both your departure and arrival airports will scan this QR code to verify your registration.
Method 2: eGovPH Mobile App
The Philippine government has integrated eTravel registration into the eGovPH super-app, which is the government’s all-in-one digital services platform. The app is available for free:
- iOS: Search “eGovPH” on the Apple App Store
- Android: Search “eGovPH” on the Google Play Store
Using the eGovPH app for eTravel registration offers several advantages over the web version:
- Offline QR code access: Once generated, your QR code is stored locally on your device and can be accessed even without an internet connection at the airport
- Push notifications: The app sends reminders when the 72-hour registration window opens for your scheduled trip
- Multi-service integration: Access to other Philippine government digital services from the same app, including national ID verification and government payments
- Faster repeat registrations: The app saves your personal information, so subsequent trips require less data entry
- Multi-language support: Interface available in English and Filipino with additional language options
Registration Timeline and Validity
| Detail | Requirement |
|---|---|
| Registration window opens | 72 hours (3 days) before arrival or departure |
| Earliest you can register | 3 days before your scheduled flight |
| Latest you can register | Must be completed before airline check-in |
| QR code validity | Single use – valid for one trip only |
| Re-registration | Required for every new trip to or from the Philippines |
| Account validity | Your eTravel account remains active; only the QR code expires |
Pro tip: Set a reminder on your phone for exactly 72 hours before your flight departure. Register immediately when the window opens. Airport internet connectivity can be unreliable, especially at smaller regional airports, and completing registration in advance eliminates last-minute stress.
What Documents Do You Need for eTravel Registration?
Before starting your eTravel registration, have the following documents and information readily available:
-
Valid passport – Must be valid for at least 6 months beyond your intended period of stay in the Philippines. This is a standard Philippine immigration requirement enforced at all ports of entry. If your passport expires within 6 months of your arrival date, renew it before traveling.
-
Flight booking confirmation – Your e-ticket or booking confirmation showing the airline name, flight number, and travel dates. You will need the exact flight number (e.g., “5J 929” for Cebu Pacific, “PR 655” for Philippine Airlines).
-
Accommodation details – The name, full address, and city/province of your hotel, resort, Airbnb, or host family residence in the Philippines. Immigration officers may ask about your accommodation, so have this information memorized or easily accessible.
-
Return or onward flight ticket – Visa-free travelers are typically required to show proof of onward travel within their permitted stay period. Ensure you have a return ticket or a ticket to your next destination that falls within your allowed stay duration.
-
Vaccination certificate – While COVID-19 vaccination is no longer mandatory for entry as of 2026, carrying your vaccination record (digital or physical) is still recommended, especially for yellow fever if arriving from affected countries in Africa or South America.
-
Email address access – You will need to verify your email during account creation and may receive important travel advisories or updates from the Philippine government.
Visa-Free Entry to the Philippines
Nationals of 157 countries can enter the Philippines without obtaining a visa in advance. The eTravel registration is still required for all travelers regardless of visa status. The length of permitted stay varies by nationality:
59-Day Visa-Free Stay
Citizens of Brazil, Israel, and a select group of other nations are permitted to stay in the Philippines for up to 59 days without a visa. This extended period reflects bilateral agreements between the Philippines and these countries.
30-Day Visa-Free Stay (Most Common)
The majority of visa-free travelers, including nationals from the United States, United Kingdom, Canada, Australia, Japan, South Korea, New Zealand, and most European Union member states, are granted a 30-day visa-free stay. This is the most common arrangement and covers the vast majority of tourist visits to the Philippines.
14-Day Visa-Free Stay
Citizens of certain countries, including India (standard arrangement, though enhanced 30-day entry is available for Indian nationals holding valid visas from select countries), are allowed a 14-day visa-free stay.
Visa-Required Nationals
Travelers from countries not included in the visa-free list must obtain an appropriate visa from a Philippine embassy or consulate in their home country before departure. The eTravel registration is still mandatory regardless of whether you hold a visa or qualify for visa-free entry.
Important note for all visa-free travelers: Even though you do not need a visa, Philippine immigration officers have the discretion to ask for proof of onward travel (return ticket), proof of sufficient financial means for your stay, and accommodation details. Having these documents readily available at the immigration counter can prevent complications.
eTravel for Cruise Ship Passengers
The eTravel system includes a dedicated registration pathway for cruise ship passengers arriving at Philippine seaports. If you are arriving in the Philippines aboard a cruise ship, you follow a similar registration process but select the “cruise arrival” option instead of “flight arrival” and enter your cruise ship name and itinerary details instead of flight information.
Popular Philippine cruise ports where eTravel registration is required include:
– Manila (Port of Manila – the country’s largest cruise terminal)
– Cebu (Cebu City International Port)
– Subic Bay (Subic Bay Freeport Zone)
– Boracay (Caticlan Jetty Port – gateway to Boracay Island)
– Puerto Princesa (Palawan’s main cruise port)
Cruise passengers should complete their eTravel registration before their ship docks at the Philippine port. Some cruise lines provide internet access on board for this purpose, though connectivity fees may apply.
Common eTravel Registration Mistakes to Avoid
Mistakes during eTravel registration are one of the most common causes of airport delays and immigration complications for travelers to the Philippines. Here are the most frequent errors and how to avoid them:
1. Mismatched Passport Information
The name on your eTravel registration must match your passport character for character. This includes middle names, suffixes (Jr., Sr., III), and hyphenated names. Even a single character difference – such as “Michael” vs. “Micheal” – can cause your registration to be flagged at immigration. Always copy your name exactly as it appears in the machine-readable zone of your passport.
2. Incorrect Flight Number
Entering an incorrect flight number means your QR code will not match your actual arrival or departure record in the airline’s manifest system. This mismatch can cause delays while immigration officers manually verify your details. Double-check your flight number against your booking confirmation or e-ticket.
3. Registering Too Early or Too Late
The eTravel system strictly enforces the 72-hour registration window. Attempting to register more than 3 days before your flight will result in an error message. Conversely, waiting until you arrive at the airport to register creates unnecessary stress and delays, especially if you encounter connectivity issues.
4. Not Saving the QR Code
If you fail to save or screenshot your QR code after registration, you will need to log back into the eTravel system at the airport to retrieve it. This requires internet access, which may be limited or expensive at some airports. Always save your QR code immediately after registration.
5. Using Unofficial or Scam Websites
Several third-party websites masquerade as official eTravel registration platforms. These sites may charge fees ranging from $20 to $50, collect your passport data for fraudulent purposes, or provide fake QR codes. Only use the official etravel.gov.ph website or the eGovPH app. The registration is always, without exception, completely free.
6. Outdated Contact Information
Ensure your email address and phone number are current and accessible during your trip. The Philippine government may send important travel advisories, health alerts, or system updates to the contact information on your registration.
7. Wrong Port of Entry
Selecting the wrong airport or seaport as your entry point can create mismatches in the system. If you are connecting through a Philippine airport before reaching your final destination, select the airport where you will first clear immigration.
What Happens at the Airport?
Understanding the airport process helps you prepare and reduces anxiety, especially for first-time visitors to the Philippines.
For Arriving Passengers
-
Before boarding at your origin airport: Many airlines now check for valid eTravel registration at the check-in counter or boarding gate. Some carriers will deny boarding if you cannot present a valid QR code. Have your QR code ready on your phone screen or a printed copy.
-
During your flight: Some airlines distribute additional customs or arrival forms during the flight. These are separate from eTravel and may still need to be completed.
-
Upon arrival at the Philippine airport: Follow signs to the immigration area. Join the appropriate queue (foreign passport holders or Filipino citizens). When you reach the immigration counter, the officer will scan your eTravel QR code using a handheld device or desktop scanner.
-
Immigration processing: After your QR code is verified, the immigration officer will process your entry following standard procedures – checking your passport, asking about the purpose and duration of your stay, and potentially requesting to see your return ticket or accommodation confirmation.
-
Baggage claim and customs: After clearing immigration, proceed to baggage claim. Your customs declaration from the eTravel form is linked to your QR code, which customs officers can reference.
For Departing Passengers
-
At airline check-in: Present your eTravel departure QR code along with your passport and booking confirmation. The airline agent will verify your registration before issuing your boarding pass.
-
Immigration (departure): The departure immigration officer will scan your eTravel code as part of the standard exit process. This replaces the old paper departure cards for many travelers.
eTravel and the eGovPH Super-App
The Philippine government has been aggressively digitizing public services through the eGovPH super-app, which serves as the country’s central digital government platform. The app goes far beyond travel registration and offers access to numerous government services:
- Philippine National ID (PhilSys) verification and digital ID
- Government service payments – pay fees, fines, and bills electronically
- Tax filing and payment through the Bureau of Internal Revenue
- Social benefits registration for government assistance programs
- Civil registry services – birth certificates, marriage certificates
- Travel-related documentation beyond eTravel
By using the eGovPH app for your eTravel registration, you gain seamless access to all these services from a single platform. For frequent travelers to and from the Philippines, downloading and familiarizing yourself with the eGovPH app before your trip is highly recommended.
Frequently Asked Questions About eTravel
Is eTravel registration mandatory for everyone?
Yes. All international passengers arriving in or departing from the Philippines must complete eTravel registration. There are no exemptions based on age, nationality, or purpose of travel. Even infants and children require their own individual registration.
How much does eTravel registration cost?
Nothing. The eTravel registration is completely and permanently free. The Philippine government does not charge any fee for this service. Any website, app, or service claiming to charge a fee for eTravel registration is a scam or an unnecessary third-party intermediary.
Can I register someone else (a family member or child) for eTravel?
Yes. You can complete the registration on behalf of another person, including elderly family members, children, or anyone who needs assistance. You will need their passport details and travel information. Each person still receives their own individual QR code.
What if I made a mistake on my submitted eTravel form?
You can log back into your eTravel account and edit your submission before your travel date. The system allows corrections to most fields. If you discover an error at the airport, you may need to complete a new registration from scratch.
Do children and infants need their own eTravel registration?
Yes. Every passenger, regardless of age – including newborns – must have their own eTravel registration with a unique QR code. Parents or legal guardians can complete the registration on behalf of their children using the child’s passport details.
What if I don’t have internet access at the airport?
This is precisely why you should complete your eTravel registration at your hotel, home, or any location with reliable internet before heading to the airport. Save the QR code as a screenshot on your phone’s photo gallery and optionally print a paper backup.
Is eTravel the same as a visa?
No. The eTravel system is a travel declaration and health screening platform, not a visa. Completing eTravel registration does not grant you permission to enter the Philippines if you are from a country that requires a visa. You must still obtain the appropriate visa from a Philippine embassy or consulate if your nationality requires one.
How long is the eTravel QR code valid?
Each QR code is valid for a single trip only. After your trip is completed, that QR code expires. You must complete a new eTravel registration for every subsequent arrival or departure.
Can permanent residents or long-term visa holders skip eTravel?
No. All international travelers, regardless of their immigration status in the Philippines – including permanent residents, special work permit holders, student visa holders, and retirees with SRRV visas – must complete eTravel registration for every international trip.
What languages is the eTravel platform available in?
The eTravel platform primarily supports English and Filipino (Tagalog). The interface is designed to be intuitive for international travelers with clear labels, tooltips, and instructions in both languages.
Do I need to print my eTravel QR code?
Printing is not required but is strongly recommended as a backup. A digital copy on your phone is sufficient, but having a paper copy ensures you can present your QR code even if your phone loses power or encounters technical issues.
Tips for a Smooth eTravel Experience
- Register early: Complete your registration as soon as the 72-hour window opens. Do not wait until you are at the airport.
- Use only the official platform: Register exclusively through etravel.gov.ph or the eGovPH app. Avoid third-party services.
- Save your QR code in multiple places: Screenshot it, email it to yourself, and optionally print a physical copy.
- Double-check every detail: Verify your passport number, flight number, spelling of your name, and travel dates before submitting.
- Keep your passport within reach: You will need your passport number and expiry date during the registration process.
- Monitor for travel advisories: Philippine entry requirements can change. Check the official etravel.gov.ph site, the Bureau of Immigration website, and your airline’s travel advisories before departure.
- Arrive at the airport prepared: Have both a digital copy (on your phone) and a physical copy (printed) of your QR code readily accessible.
- Download the eGovPH app before your trip: If you plan to visit the Philippines regularly, the app simplifies repeat registrations and provides offline access to your QR code.
- Use a stable internet connection: Complete your registration on a reliable Wi-Fi connection rather than relying on mobile data or airport Wi-Fi.
- Check your passport validity: Ensure your passport is valid for at least 6 months beyond your planned departure date from the Philippines.
Conclusion
The Philippines eTravel Pass is a straightforward but mandatory requirement for anyone traveling to or from the Philippines. By registering through the official etravel.gov.ph website or the eGovPH mobile app within the 72-hour window before your trip, you ensure a seamless immigration experience at any Philippine airport or seaport. The process is entirely free, takes only a few minutes to complete, and generates a unique QR code that serves as your digital travel pass through Philippine ports of entry.
Whether you are a first-time visitor enchanted by the Philippines’ 7,641 islands, a returning Filipino reconnecting with family and loved ones, or a frequent business traveler navigating Manila’s bustling commercial districts, completing your eTravel registration in advance is the simplest and most effective way to start your Philippine journey on the right foot. Do not leave it to the last minute – register as soon as the window opens, save your QR code, and travel with confidence.
Last updated: July 2026. For the most current requirements and any changes to the eTravel system, always check the official eTravel website and the Bureau of Immigration before your trip.